Actions
Actions allow us to interact with our contracts using a JavaScript environment; similar to the front end of an application. Multiple smart contract method calls and transactions are required to complete certain complex actions. For example, executing a Swap action on Uniswap involves at least two calls for most tokens: approve tokens (approve), and execute swap (swapExactTokensForTokens). Actions allow us to complete these kinds of interactions on smart contracts.
To create an action, click on the Add icon as shown below:
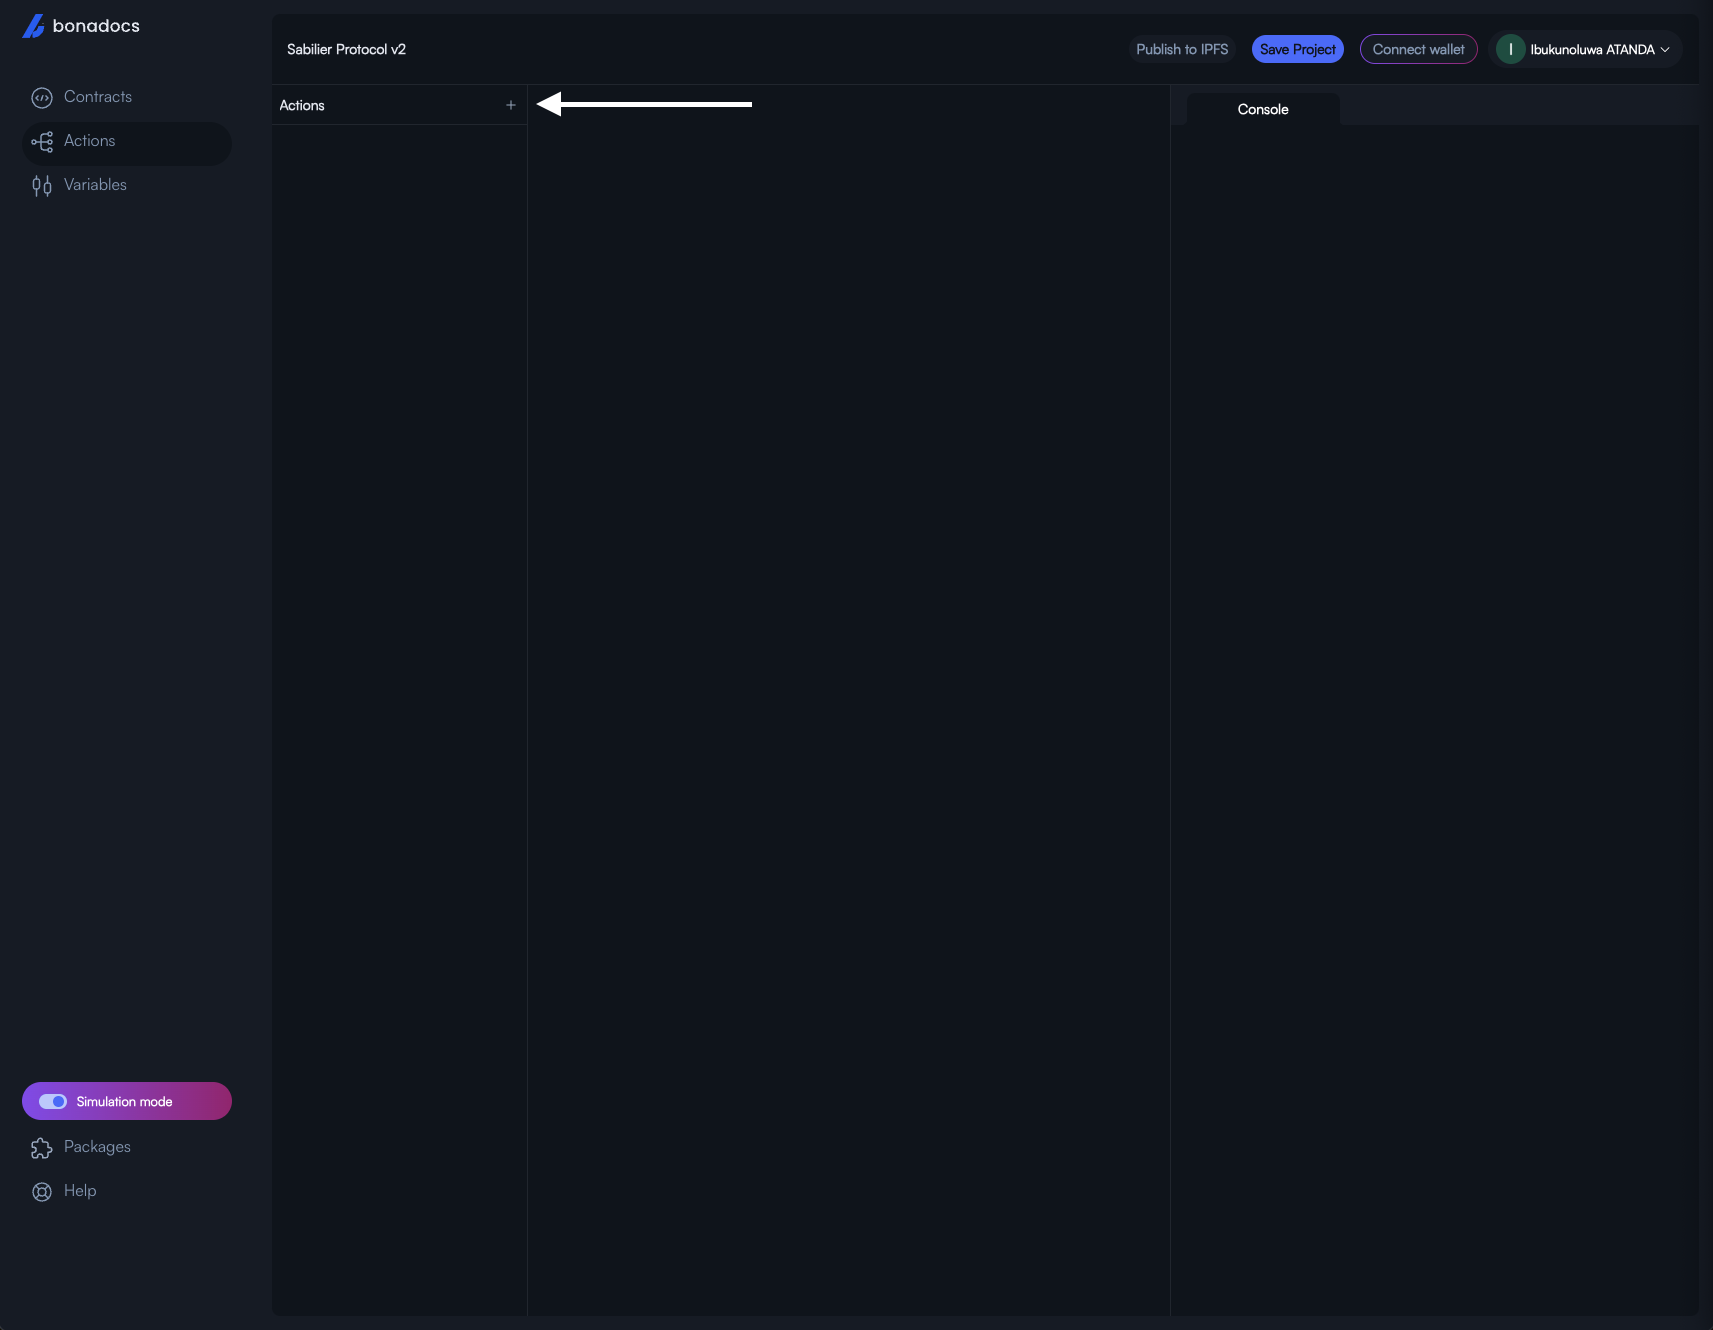
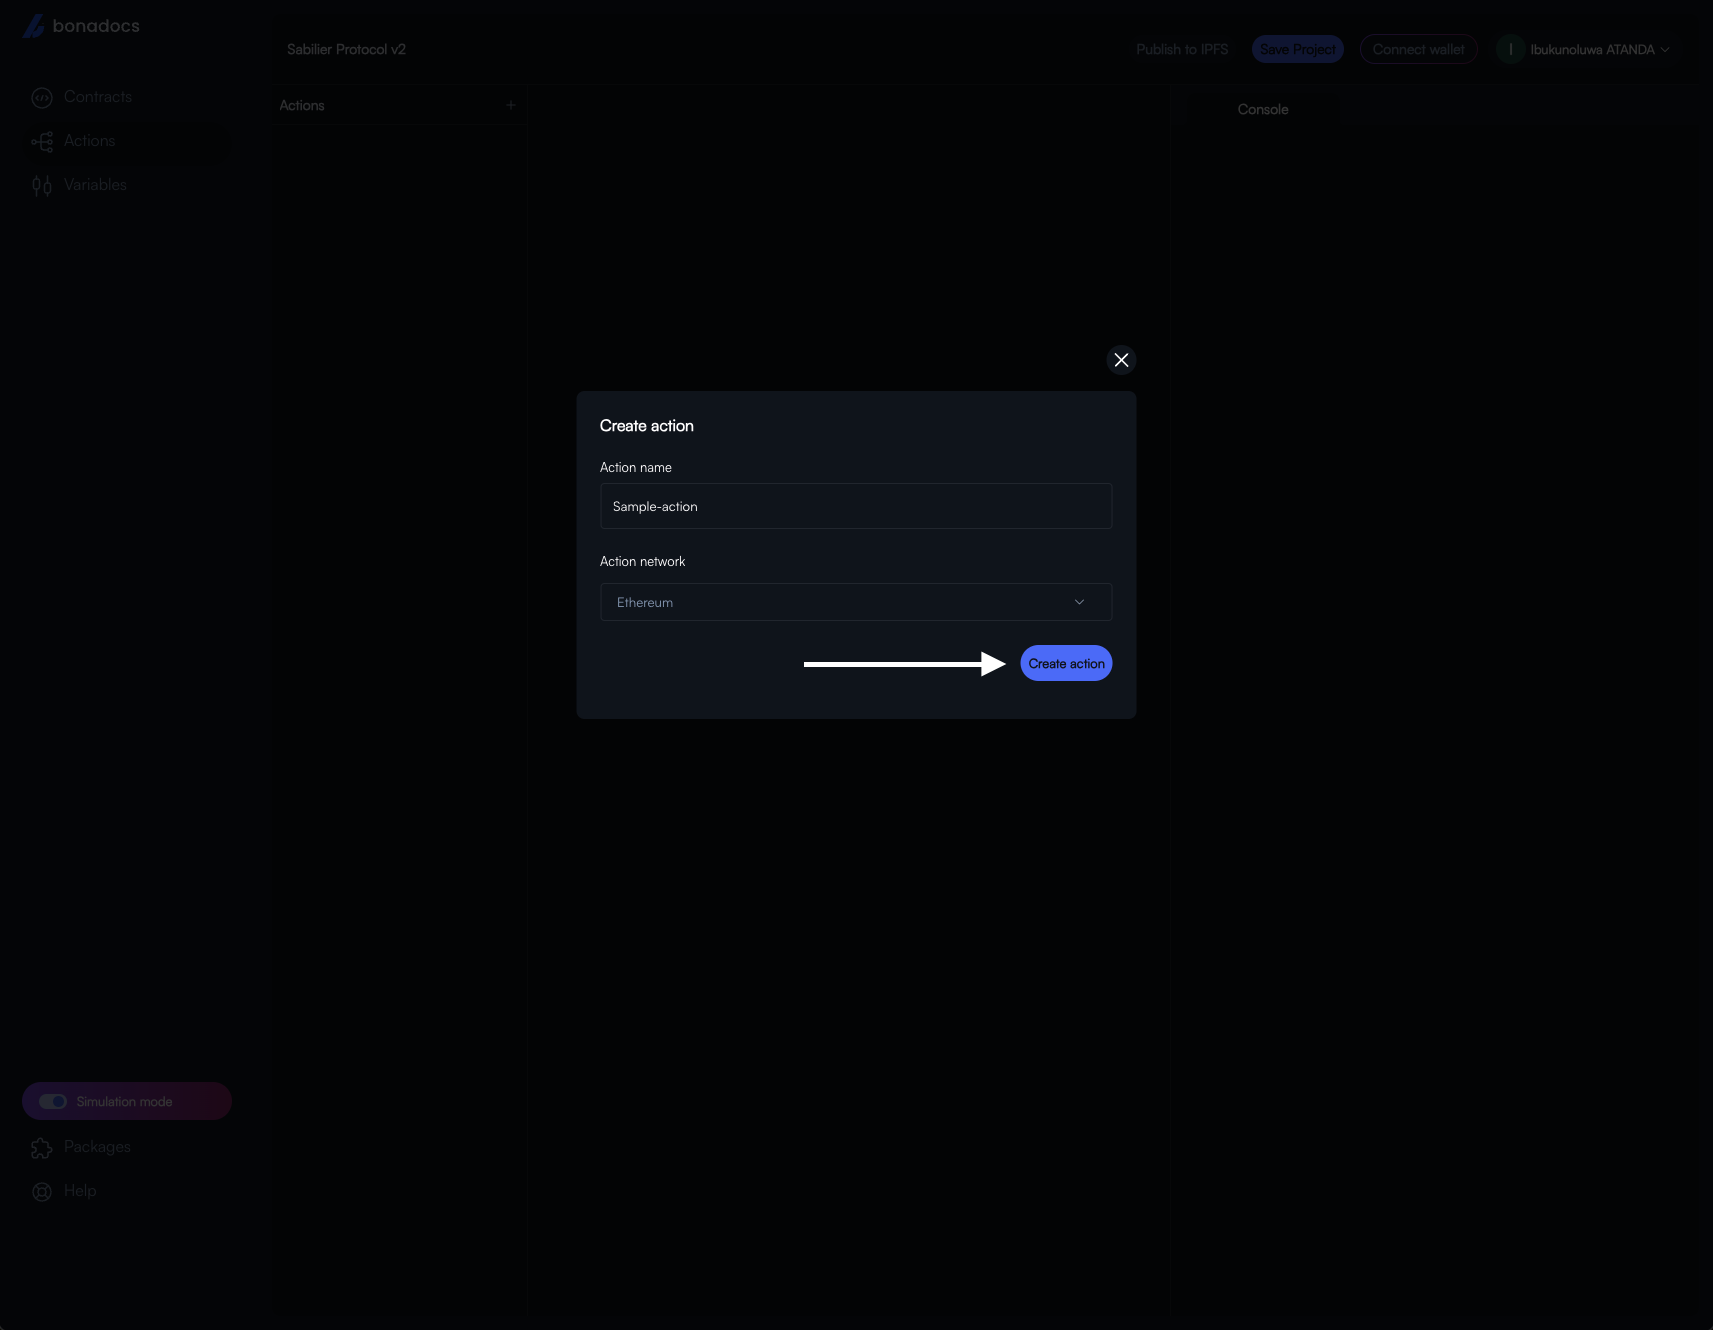
Add your action name and select the network you want to run your actions on. The network you select is determined by which networks your contracts are deployed on.
Built-in Variables
We have certain built-in variables that allow developers to access and initialize their contracts, etc.
The most used built-in variables includes:
- Ethers variables (
parseUnits,formatUnits,ZeroAddress, etc).
const { Contract, formatUnits, parseUnits, BigNumber, ZeroAddress } = ethers;
Support for the viem library is still in development.
bonadocs.contracts: This contains all the contracts inside the playground. In the example below, we want to use theSablierV2LockupLinearcontract in our playground.
const { address: sablierV2LockupLinearAddress, abi: sablierV2LockupLinearAbi } =
  bonadocs.contracts.SablierV2LockupLinear;
Once you add your contracts, you can destructure it to get the address, and ABI of the contract. Similarly, you can also get the chainId and name of the contract.
bonadocs.commonAbis.erc20: basicerc20abi in a format supported byethers.
const erc20Abi = bonadocs.commonAbis.erc20;
Simulation Engine
Actions use simulation engines to enable to run within the playground. The reason is that this allows developers to get access to a provider and signer for contract interaction without connecting an actual wallet. Currently, we support the following simulators:
Buildbear
Buildbear is a simulation engine that allows you to fork your preferred network and gives you access to a faucet, RPC URL, explorer, etc for your forked network. This allows you to interact with your contract within our controlled action environment.
The code template below creates a new wallet with ethers, funds it with gas fees, and the preferred token for the transaction. Then, it makes the provider and signer available for the actual transaction. You'll have to go to Buildbear to get your network's RPC URL.
// ⚠️ Write action in Javascript
// ⚠️ Make sure to replace the BUILDBEAR_RPC_URL and CONTRACT_ADDRESS_OF_TOKEN_ON_NETWORK with the actual values for your BuildBear simulation environment

const { Contract, formatUnits, parseUnits, BigNumber, ZeroAddress, Mnemonic, Wallet } = ethers;
// const { address, abi } = bonadocs.contracts.{CONTRACT_NAME};
const BUILDBEAR_RPC_URL = '';
const CONTRACT_ADDRESS_OF_TOKEN_ON_NETWORK = ''; // Replace with the actual contract address of the token you want to fund
const provider = new ethers.JsonRpcProvider(BUILDBEAR_RPC_URL);
const signer = Wallet.fromPhrase(Mnemonic.fromEntropy(ethers.randomBytes(24)).phrase, provider);
const blockNumber = await provider.getBlockNumber();
console.log(blockNumber);

await(async () => {
    try {
        // Funding the created wallet with gas fees
        await fetch(BUILDBEAR_RPC_URL, {
            method: "POST",
            headers: {
                "Content-Type": "application/json"
            },
            body: JSON.stringify({
                jsonrpc: "2.0",
                id: 1,
                method: "buildbear_nativeFaucet",
                params: [
                    {
                        address: signer.address,
                        balance: "10000000000000000000",
                        unit: "wei"
                    }
                ]
            })
        }

        )

        // Fund any ERC20 token using buildbear_ERC20Faucet
        await fetch(BUILDBEAR_RPC_URL, {
            method: "POST",
            headers: {
                "Content-Type": "application/json"
            },
            body: JSON.stringify({
                jsonrpc: "2.0",
                id: 1,
                method: "buildbear_ERC20Faucet",
                params: [
                    {
                        address: signer.address,
                        balance: "10000000000000000000",
                        token: CONTRACT_ADDRESS_OF_TOKEN_ON_NETWORK,
                        unit: "wei"
                    }
                ]
            })
        })

    } catch (err) {

        console.log(err)
    }

})();

// Initiate your contracts (bonadocs.contracts) with the signer

// const contractName = new Contract(
//     address,
//     abi,
//     signer,
// );
Tenderly virtual Testnet
Tenderly virtual testnet is a simulation engine by tenderly that allows you to fork your preferred network and gives you access to a faucet, RPC URL, explorer, etc for your forked network. This allows you to interact with your contract within our controlled action environment.
The code template below creates a new wallet with ethers, funds it with gas fees, and the preferred token for the transaction. Then, it makes the provider and signer available for the actual transaction. You'll have to go to Tenderly to get your network's RPC URL.
// ⚠️ Write action in Javascript
// ⚠��️ Make sure to replace the TENDERLY_RPC_URL, USDC_CONTRACT_ADDRESS, and USDC_DECIMALS with the actual values for your Tenderly simulation environment
const { Contract, formatUnits, parseUnits, BigNumber, ZeroAddress, Mnemonic, Wallet } = ethers;
const TENDERLY_RPC_URL = "";
const USDC_CONTRACT_ADDRESS = ""; // Replace with the actual contract address of your token on the network
// const { address, abi } = bonadocs.contracts.{CONTRACT_NAME}; // Replace with the actual contract name
const provider = new ethers.JsonRpcProvider(TENDERLY_RPC_URL);
const signer = Wallet.fromPhrase(Mnemonic.fromEntropy(ethers.randomBytes(24)).phrase, provider);
await(async () => {
// Funding the created wallet with gas fees
await provider.send("tenderly_setBalance", [
signer.address,
"0xDE0B6B3A7640000", // ~1 ETH for gas fees
]);
const USDC_DECIMALS = 6;
// Fund with USDC using tenderly_setErc20Balance
const usdcAmount = "1000"; // 1000 USDC (Replace with the actual decimals of your token on the network)
const usdcAmountWei = ethers.parseUnits(usdcAmount, USDC_DECIMALS);
await provider.send("tenderly_setErc20Balance", [
USDC_CONTRACT_ADDRESS,
signer.address,
ethers.toBeHex(usdcAmountWei)
]);
})();
// Initiate your contracts (bonadocs.contracts) with the signer
// const contractName = new Contract(
// address,
// abi,
// signer,
// );
Zimulatoor
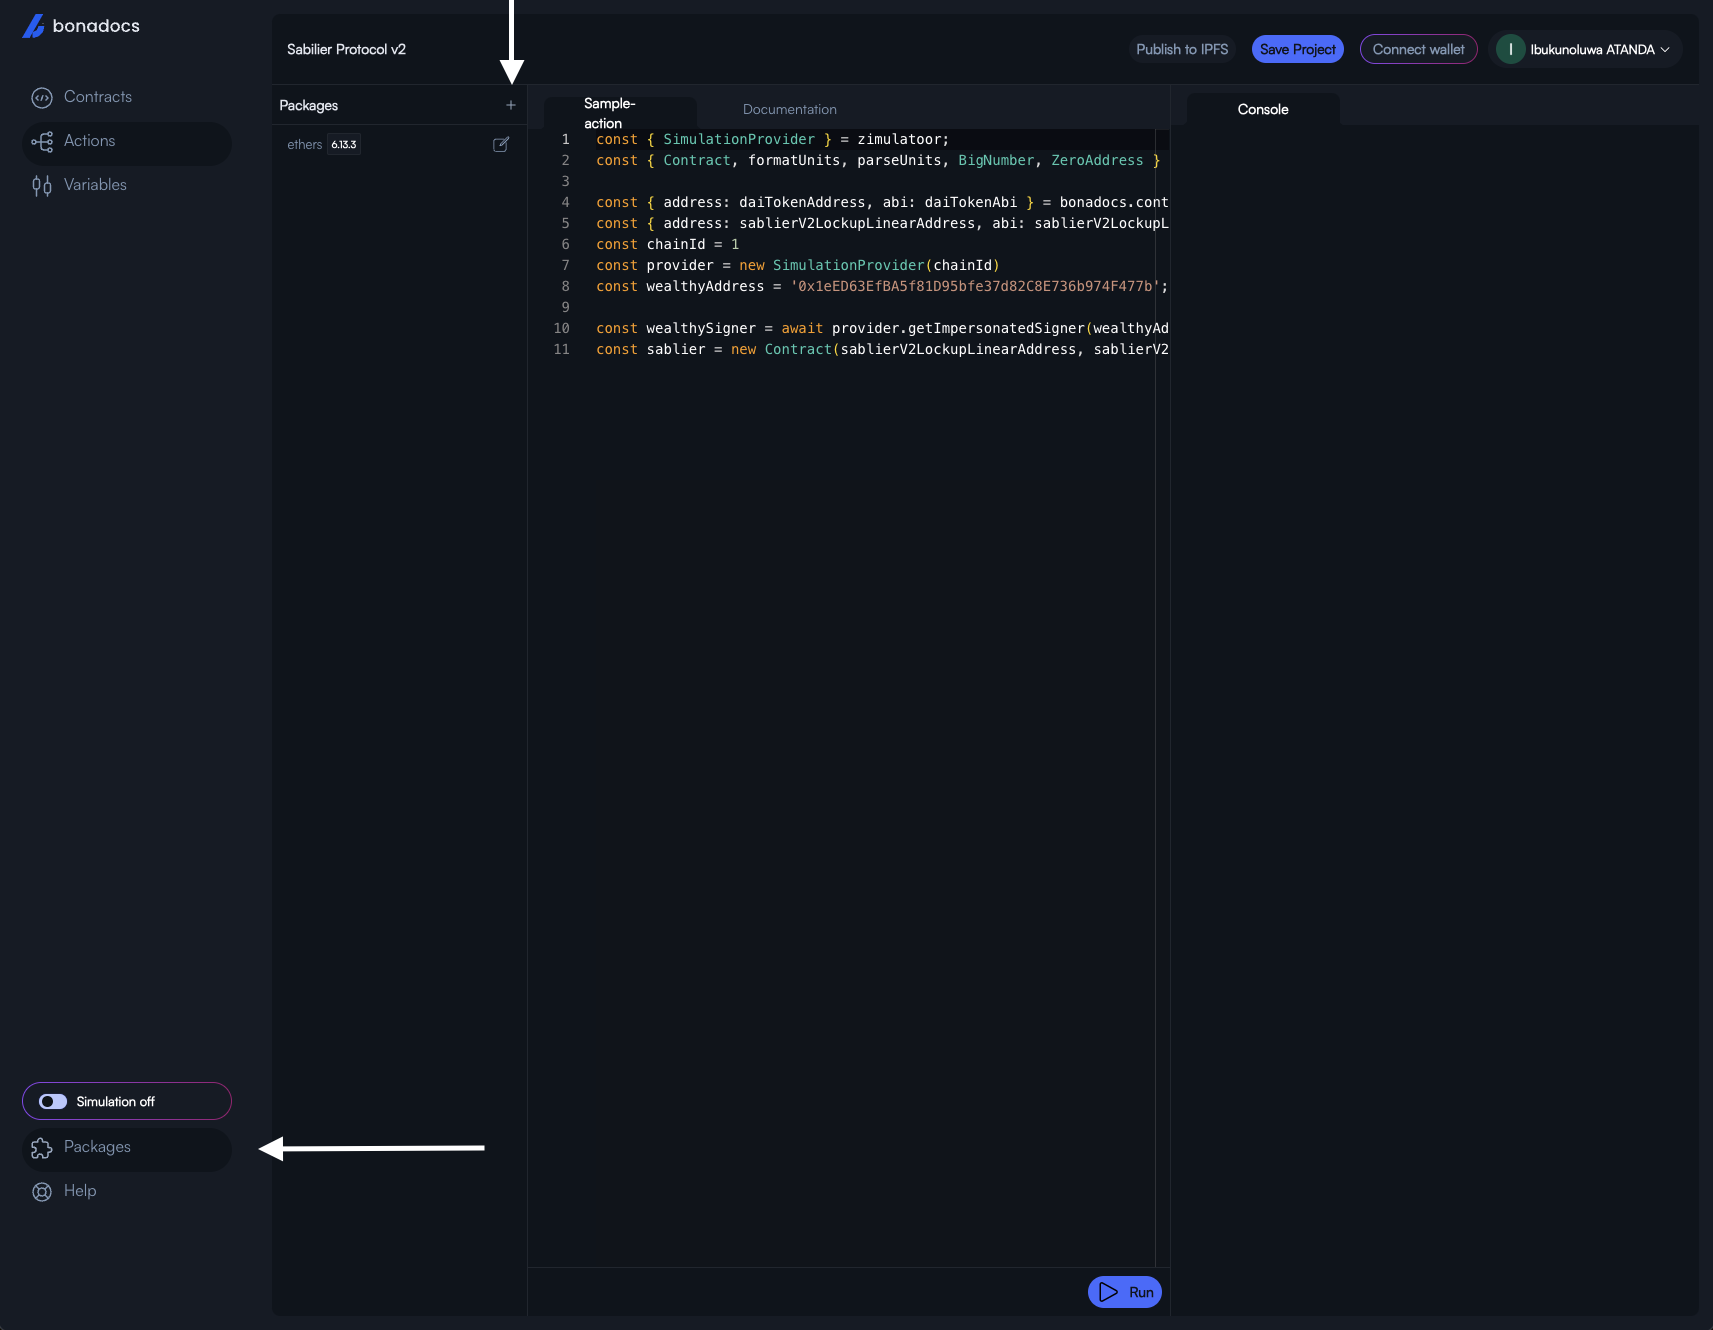
SimulationProvider from zimulatoor. It's our native simulation engine that allows us to create simulated signers for any address, which is used to initialize the contracts and make queries. It creates a simulated provider for any wallet and doesn't require you to bring in a new wallet private key.
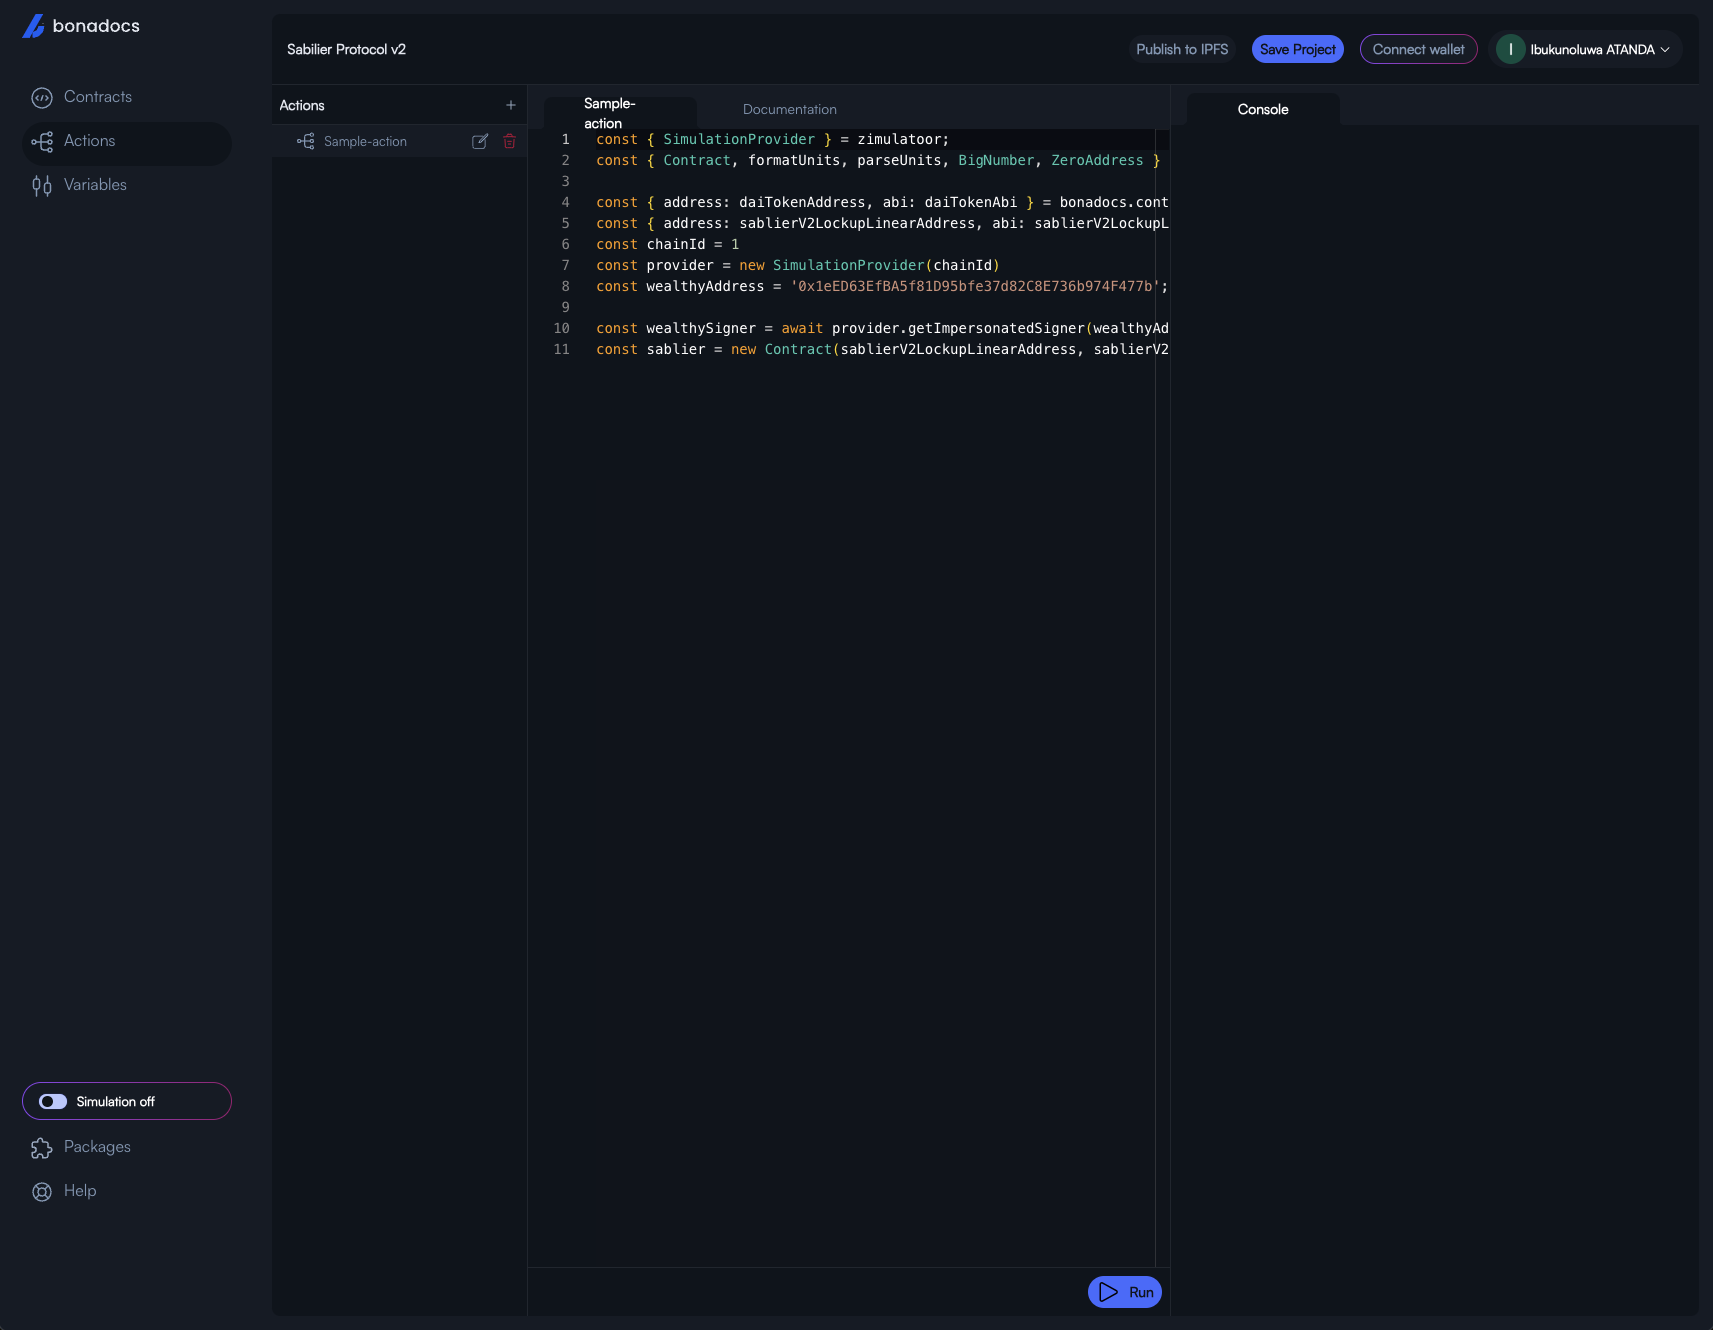
const { SimulationProvider } = zimulatoor;
When we use them together, we create the provider using the chainId. Then, we use the provider.getImpersonatedSigner() to create the signer (wealthySigner) for our wealthyAddress.
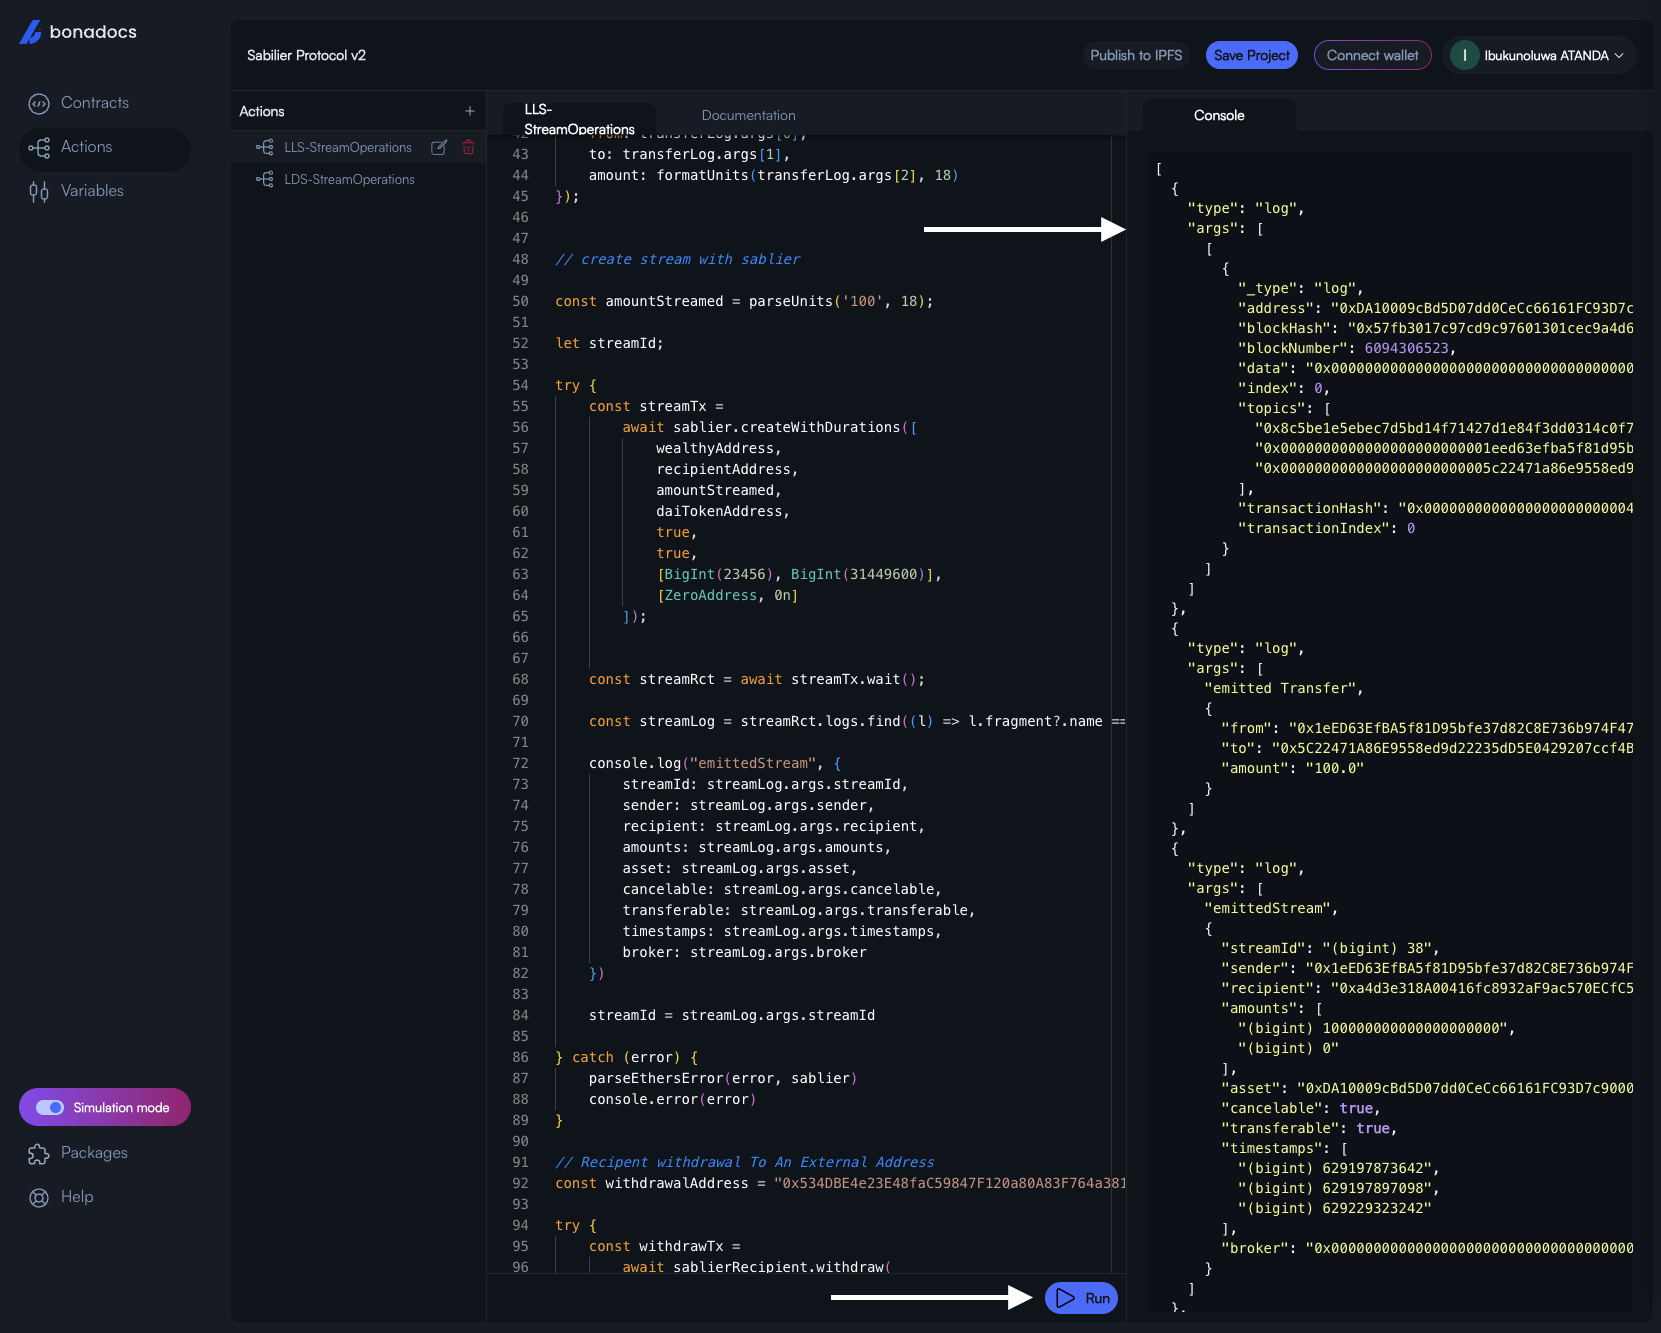
The sablier contract is now initiated using:
sablierV2LockupLinearAddresssablierV2LockupLinearAbiwealthySigner
const { Contract, formatUnits, parseUnits, BigNumber, ZeroAddress } = ethers;

const { address: sablierV2LockupLinearAddress, abi: sablierV2LockupLinearAbi } =
  bonadocs.contracts.SablierV2LockupLinear;
const chainId = 1;
const provider = new SimulationProvider(chainId);
const wealthyAddress = "0x1eED63EfBA5f81D95bfe37d82C8E736b974F477b";

const wealthySigner = await provider.getImpersonatedSigner(wealthyAddress);
const sablier = new Contract(
  sablierV2LockupLinearAddress,
  sablierV2LockupLinearAbi,
  wealthySigner
);
Once we initiate the sablier contract, we can now use it to query methods. Below, we use it to query the createWithDurations method.
try {
  const streamTx = await sablier.createWithDurations([
    wealthyAddress,
    recipientAddress,
    amountStreamed,
    daiTokenAddress,
    true,
    true,
    [BigInt(23456), BigInt(31449600)],
    [ZeroAddress, 0n],
  ]);

  const streamRct = await streamTx.wait();

  const streamLog = streamRct.logs.find(
    (l) => l.fragment?.name === "CreateLockupLinearStream"
  );

  console.log("emittedStream", {
    streamId: streamLog.args.streamId,
    sender: streamLog.args.sender,
    recipient: streamLog.args.recipient,
    amounts: streamLog.args.amounts,
    asset: streamLog.args.asset,
    cancelable: streamLog.args.cancelable,
    transferable: streamLog.args.transferable,
    timestamps: streamLog.args.timestamps,
    broker: streamLog.args.broker,
  });

  streamId = streamLog.args.streamId;
} catch (error) {
  parseEthersError(error, sablier);
  console.error(error);
}
P.S: We make use of parseEthersError to properly parse errors. It's built into the action code environment; not imported from ethers.
Direct Mainnet/Testnet Interaction
Developers can also interact with their contracts over mainnet or testnet. They would have to bring in their private key and funded address into the actions.
// ⚠️ Write action in Javascript
const { Contract, formatUnits, parseUnits, BigNumber, ZeroAddress, Mnemonic, Wallet } = ethers;

const TESTNET_RPC_URL = ''; // Replace with your RPC URL
const PRIVATE_KEY = ''; // Replace with your actual private key
// const { address, abi } = bonadocs.contracts.{CONTRACT_NAME}; // Replace with the actual contract name

// Initialize provider
const provider = new ethers.JsonRpcProvider(TESTNET_RPC_URL);

// Method 1: Create wallet (which is a signer) with provider
const wallet = new Wallet(PRIVATE_KEY, provider);
const signer = wallet; // wallet IS a signer


// Initiate your contracts (bonadocs.contracts) with the signer
// const contractName = new Contract(
//     address,
//     abi,
//     signer,
// );
Self
Actions run in a dedicated worker in the browser, so they can access any browser API using self.
In the example below, we use self.crypto the same way you use window.crypto in your browser.
 const encrypted = await self.crypto.subtle.encrypt(
    {
      name: 'RSA-OAEP'
    },
    publicKey: CryptoKey,
    dataBuffer: Uint8Array
  );
Packages
Our package feature is experimental and doesn't yet cover all package importation edge cases. We recommend that developers use native JS and browser APIs over importing packages into the actions environment.
You can add custom NPM packages to your actions. Click on Packages and the Add icon below
After which, you search for your preferred package and click on the Add Package button.
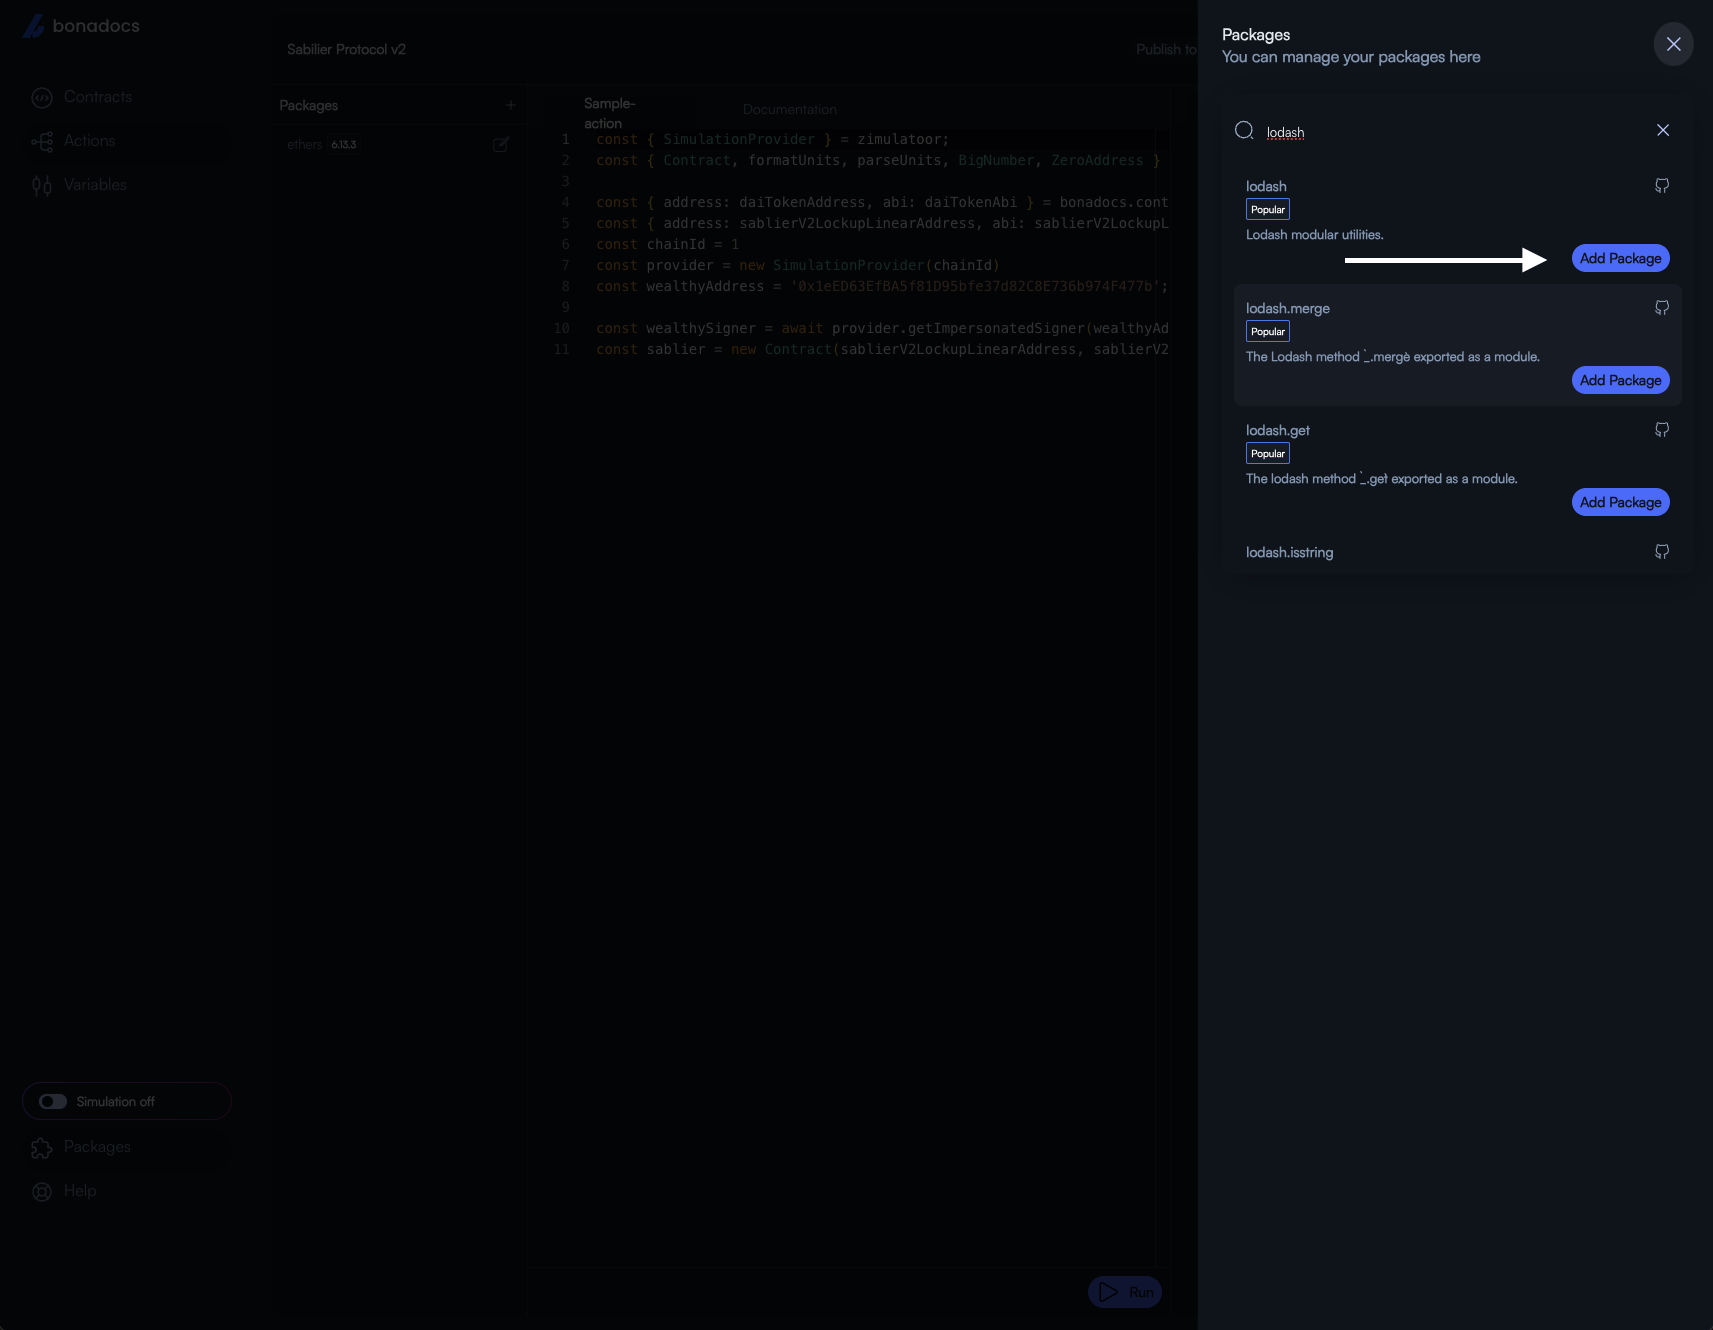
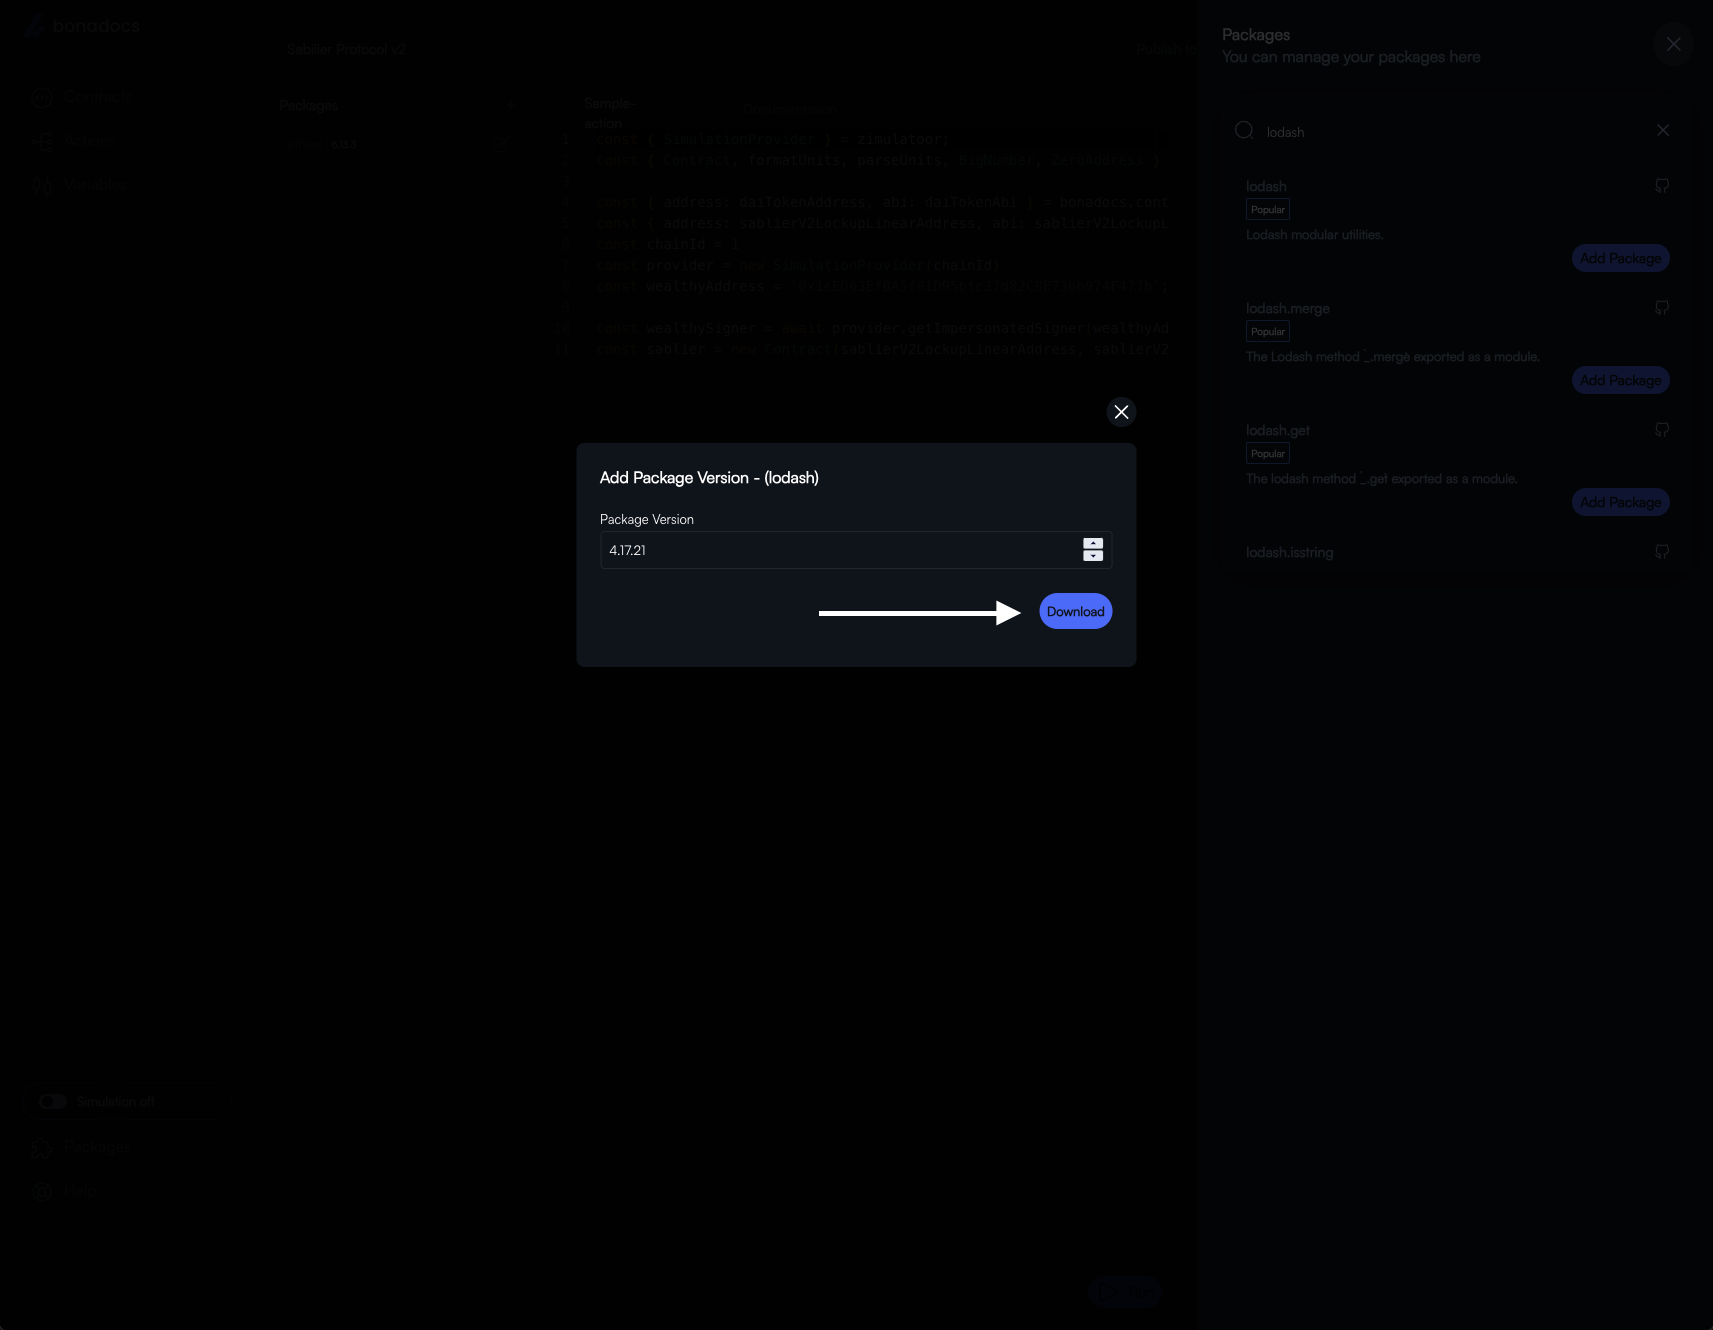
This opens up a modal to select the version that you need. Finally, click Download.
Here's how you make use of the package inside your action. In this case, lodash.
const _ = require("lodash");

const object1 = { a: 1, b: { c: 2 } };
const object2 = { a: 1, b: { c: 2 } };

const areObjectsEqual = _.isEqual(object1, object2);

console.log(areObjectsEqual);
P.S: Only packages with esm modules need the require function to get the module data. umd modules are accessible directly with the global object added by the module, i.e, ethers above.
You can also use your package's CDN link to quickly use it within the action.
Run Your Action
Click on the Run button below and you'll get your response on the right.